Using the CAT ET (Electronic Technician) with the CAT ET Diagnostic Adapter is essential for effective diagnostics and troubleshooting of Caterpillar machinery. This guide will walk you through the necessary steps to ensure a seamless connection and efficient use of the diagnostic tools.
1. Requirements
Before you begin, make sure you have the following:
– CAT ET Software: This must be installed and activated on a compatible Windows laptop.
– CAT Communication Adapter: Ensure you have Comm Adapter 3 or a newer version.
– Connection Cables: These are needed for the data link connection.
– Caterpillar Equipment: Ensure your machinery has an accessible service port
2. Setup & Connection
Install CAT ET Software
– First, ensure that the CAT ET software is correctly installed on your laptop. Follow the installation prompts, and make sure to activate the software.
– Install any necessary drivers for the CAT Communication Adapter to ensure proper functionality.
Connect the Adapter
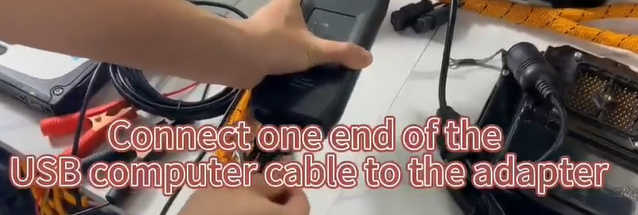
– Plug the CAT Comm Adapter into your laptop using a USB or serial cable.
– Use the appropriate data link cable to connect the adapter to the service port on your CAT machine. The service port could be a 9-pin or 14-pin connector, depending on the model.
Power On the Machine
– Turn the ignition key to the ON position. The engine can be off or running, depending on the type of diagnostics you need to perform.
Launch CAT ET Software
– Open the Caterpillar Electronic Technician (ET) software on your laptop.
– Wait for the software to detect the connected adapter.
3. Diagnostics & Troubleshooting
Select the Communication Adapter
– In the ET Settings menu, select the correct communication adapter (Comm Adapter 3 or newer).
Establish Communication
– Click the “Connect” button within the ET software. The software will attempt to establish a link with the Electronic Control Module (ECM) on your Caterpillar equipment.
View ECM Data
– Once connected, you can access various data, including:
– Active and logged fault codes
– ECM configuration and parameters
– Real-time data monitoring (such as engine speed, fuel pressure, and temperatures)
– Diagnostic tests and calibrations
Perform Diagnostics
– Read any fault codes and troubleshoot issues based on the descriptions provided.
– Run automated diagnostic tests for components such as injectors, sensors, turbochargers, or aftertreatment systems.
– If necessary, adjust parameters (note that some changes may require password protection).
4. Additional Functions
The CAT ET software offers several additional functionalities:
– Datalogging: Record engine or system performance data for later analysis.
– ECM Reprogramming: Update the software or reflash the ECM if needed.
– Parameter Adjustments: Modify settings such as speed limiters and fuel parameters, if your access level allows.
– Actuator Tests: Activate various components, including solenoids, injectors, and fans for testing.
5. Disconnecting & Finalizing
Once you have completed your diagnostics:
– Close the CAT ET software on your laptop to ensure that all data is saved.
– Turn off the equipment if required.
– Disconnect the communication adapter from the service port.
– Properly store the cables and adapter to prevent damage.
Using the CAT ET 4 Diagnostic Adapter with Caterpillar equipment is a straightforward process if you follow the steps outlined above. With the right setup and understanding of the software, you can effectively diagnose and troubleshoot issues, ensuring optimal performance of your machinery.
More request,welcome to contact us directly: service@autonumen.com
Our Website link: https://www.autonumen.com/


